Indoor Cycling Institute
  • Home
    • Pre-Instructor
    • Instructor CPD
    • For Managers
  • Courses
    • ONLINE indoor cycling instructor training course
    • ICI Indoor Cycling Instructor training course (1 day)
    • ICI indoor cycling instructor training course (2 day)
    • Upgrade your certificate to ICI standard
    • CPD courses
  • Course dates
    • UK indoor cycling instructor training >
      • Bridgend
      • Bristol
      • Cambridge
      • Devon (Newton Abbot)
      • Liverpool
      • St Albans
      • West Midlands (Aldridge)
    • Canada Indoor cycling instructor training
    • US Indoor cycling instructor training
    • Australia Indoor cycling instructor training
    • New Zealand Indoor cycling instructor training
    • Europe Indoor cycling instructor training
    • Denmark Indoor cycling instructor training
    • Norway Indoor cycling instructor training
  • Contact
    • About
  • Shop
  • Code of Conduct
  • Terms and conditions

7 steps to a safer, more effective indoor cycling class

17/12/2018

0 Comments

 
7 steps to a safer, more effective indoor cycling class

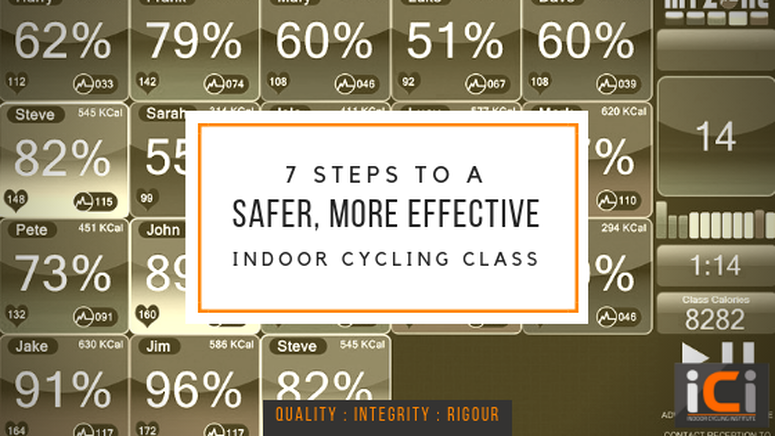
by Angela Reed-Fox

7 steps to a safer, more effective indoor cycling class

You'd think that'd be so easy everyone would be doing it, right? Well when we recently updated our entry level 2 day indoor cycling instructor course, we include a bit on litigation (because if you need your insurance, you're too late!) and as part of this we research court cases being brought against cycling studios and gyms, and we look for patterns in the reasons for the litigation, and who is being blamed. In more than 95% of recent cases (in the last five years) it's due to instructor error - instructors have either given poor instruction or have had riders doing unsafe moves.

Incidentally the remaining 5% of cases is due to either the studio being too dark for riders to see what they're doing, or equipment being poorly maintained or with sharp prominences.

What does this mean for you as an indoor cycling instructor?
It means that there's a lot you can do to reduce the risk of injury for your riders, and litigation both for yourself and your venue. Here's how:

Injury check

There are three points at which each rider should be asked about injuries, health issues or concerns:
  1. Physical Activity Readiness Questionaire (PARQ) - this should be completed when the rider registers with the venue. This might be an online form, or a hard copy form that they complete at reception before they undertake their first class.
  2. Before the session - when riders arrive and are setting themselves up on their bikes, make sure to go round the class and introduce yourself if necessary, find out names, potential risks (health issues, injuries etc) and their experience level - do they need any help with setup? Using the bike's features? Using any studio tech? Do they need extra instruction?
  3. At the beginning of the class - once you're on the instructor bike and you're kicking off the class, ask riders for a quick confirmation "Is everyone OK and happy to ride? No injuries? Issues? Excuses?" When you're satisfied everything's OK, carry on with the class.
Why three times? Because you need to know who's getting on the bike and what they are going to need as well as what limitations they have which might mean you need to modify the class or give separate instructions to them. But also, in the terms of your insurance, you will be expected to check for injuries before your cllients begin their session with you. This is a normal part of the policy. With the third point, you're also  creating witnesses in the case of a dispute.

Bike setup

All new riders need a bike setup - this is the perfect opportunity to answer any questions they have and help them feel comfortable. A suitable bike setup will reduce aches and improve comfort. Riders will be able to ride more efficiently, using more of the larger muscle groups as they pedal. This improves the calorie burn and the training effect.
Consider jotting your riders' bike settings on record cards which they can refer to at their next session and have a go at setting themselves up. Think about data protection though and make sure you destroy old cards.

Clear instruction

In the interests of safety and effectiveness, this is essential. Riders need to know what you're asking them to do, as well as how. For a bonus point, you can also tell them why it's good for them!
There are five main points you'll need to give them for each challenge:
  1. What is it? Explain what it is: "We're going to do a seated climb."
  2. How is it done? Give tips on technique "Add some resistance and slide your behind further to the back of the saddle, hands should still be light on the handlebars and no excess movement in your upper body."
  3. How long is the interval? "We're here for 30 seconds."
  4. How fast should they pedal? "Your cadence should be about 70-80rpm..."
  5. What should it feel like? "...and you're going to feel that extra effort immediately in your quads. Thirty seconds should feel like it's going to be a challenge."
You'll have heard of Rate of Perceived Exertion, and this is to do with the cardiovascular system. Use this as well, but don't forget that it's only when we describe how the resistance should feel to the muscles that riders will have a reasonable idea of what you're asking of them.
Be kind, and don't forget to cue them in and cue them out.

Safe cadence

Cadence is a biggie when it comes to rider injuries. Safe cadence also requires safe resistance. What we need to particularly guard against is crazy high cadence with insufficient resistance . Not only is this totally ineffective, but it increases the risk of the rider losing control of the pedals. (Remember, the bike has a
fixed wheel.)
So, stick to a safe cadence range. We don't recommend going lower than 60rpm. Obviously it's possible to pedal slower than this, but what tends to happen at this point is that riders either don't have sufficient resistance to be pedalling effectively, or they have so much on they're unable to pedal any faster and are overloading their joints.
We don't recommend going higher than 120rpm. But in fact, when we're instructing, we tend to encourage riders to add more resistance if they're reaching 120rpm, which will then  bring their cadence down. Yes, it's possible to pedal that fast with riders who are experienced and have good coordination. However, you'll frequently see terrible technique starting to creep in when you reach this point, which decreases effectiveness, so I'd recommend avoiding going past this point with any riders, however experienced.  Always give a cadence guide and let riders know how it should feel as well. Bouncing bottoms in the saddle are a dead giveaway - as are bikes that start squeaking when they're being pedalled fast with no resistance! It's OK to say "If I can hear your bike, you need to add on!"

Avoid banned moves

We have a list of banned moves. We strongly recommend that venues do this too, either by using ours or creating their own. We ban a move either because it's ineffective and therefore pointless, or because it's downright dangerous.
Examples include:
  • Riding hands-free. Yes, this includes when messing about with tiny little hand held weights. There is no benefit to using weights when on a bike, and there is a risk of falling off. It'll be even more complicated if the rider is clipped in as well.
  • Unsafe cadence (as mentioned above)
  • 'Standing trot' - here you're out of the saddle, resistance is light, body is very upright, and only fingertip contact with handlebars. Again, ineffective and increased risk of falling off.
  • Tap backs - when you hove out of the saddle and push your backside over the back of the saddle whilst over extending the arms. Ineffective and puts strain on the back.
  • Jumps - standing out of the saddle for a specified number of beats and then back to the saddle for the same. Usually in 4s or 8s. Occasionally at its most pointless with 2s. This is mainly ineffective, by definition half of the time the ride is not going to be riding with an effective left of resistance. It's unsafe when the resistance is too slight, and when the rider is not well-coordinated enough to be able to keep to the beats and follow the instructions.
  • Glides - this is where the rider is in an approximate standing position but seeks to lock out all upper body movement, usually with too much resistance. This overloads the joints.
Our entry level course goes through the entire list of banned moves which are unsafe and ineffective.

Measurable progress

How do riders know they're getting fitter? Remember that a lot of your riders are not in your class purely for enjoyment - they want and need results. What will you do? We recommend using power training so they can see measurable results. If we go by how we feel, this is too subjective and we'll get demotivated quickly. On the other hand, if we can point to actual quantifiable improvements, we're more likely to stay motivated as we can see our effort paying off. Ask us about our power training courses.

Heartrate training

Using heartrate training in classes is safer. Riders can get to know better how their bodies respond to activity, they know when they need to take it easier than usual, and when they can start pushing harder. They'll be able to detect when they might be overtraining, and they'll be able to stay within safe parameters as each session becomes tailored to them. Not only all this, but we've spotted instances of riders having anomalies which after medical investigation showed conditions being diagnosed such as atrial fibrillation and also blockages of arteries which led to surgery. 
So there we go - seven ways you can make your classes safer and more effective. Want help or advice on instructor practice or MyZone heartrate training? Get in touch - we're here to help you.

Indoor cycling instructor? Click below for free CPD resources. Your venue can also receive information on how we can help improve customer registration, retention, engagement and profitability.
Become an indoor cycling insider
0 Comments


Leave a Reply.

    Picture
    Picture
    Picture
    Picture
    Picture
    Picture

Quick links

Get started

Book now
Courses
Contact
Handbook

Find what's right for you

ICI for venues
Indoor Cycling Instructor course - no prior training needed
Indoor Cycling Instructor course for PTs

Courses

Entry level
Course dates
Book now
CPD


Products

Session plans
Just Instruct
MyZone

Ride/challenges

Further learning

Why ICI?
ICI Blog
Small print
Code of conduct


More

Jobs
Links

The Indoor Cycling Institute provides the most comprehensive and up to date indoor cycling instructor training; providing entry-level courses, and further education to raise the standard of instructors.
© 2014-2023 Protheorem Ltd
The Indoor Cycling Institute is owned and operated by Protheorem Ltd Registered in England & Wales, Company number 12812092
  • Home
    • Pre-Instructor
    • Instructor CPD
    • For Managers
  • Courses
    • ONLINE indoor cycling instructor training course
    • ICI Indoor Cycling Instructor training course (1 day)
    • ICI indoor cycling instructor training course (2 day)
    • Upgrade your certificate to ICI standard
    • CPD courses
  • Course dates
    • UK indoor cycling instructor training >
      • Bridgend
      • Bristol
      • Cambridge
      • Devon (Newton Abbot)
      • Liverpool
      • St Albans
      • West Midlands (Aldridge)
    • Canada Indoor cycling instructor training
    • US Indoor cycling instructor training
    • Australia Indoor cycling instructor training
    • New Zealand Indoor cycling instructor training
    • Europe Indoor cycling instructor training
    • Denmark Indoor cycling instructor training
    • Norway Indoor cycling instructor training
  • Contact
    • About
  • Shop
  • Code of Conduct
  • Terms and conditions